Setting up your storefront and menu
In this lesson, you’ll learn how to use Uber Eats Manager to create a digital menu and storefront your customers will love.
Setting up your storefront
Setting up your operations now will make running your business on Uber Eats easier.
7 things to start on first in your Manager portal
Define your hours so customers know when you’re open
Click on Menu on the left, then select Edit by any menu to update its hours (for instance, breakfast from 6am to 11am). You can also make edits within your Uber Eats Orders app once you grant it permission.
Give customers accurate delivery and pickup windows
Prep time will be automatically added based on your cuisine, but you can make additional changes in your Manager portal.
Manage multiple locations from your account
If you have multiple locations, you can view each one in your Manager portal under the Stores tab. To add additional restaurants, send us an email at restaurants@uber.com.
Update payment information to make getting paid easy
Select Payments, then go to Bank Account Details and click on Add. You’ll get paid weekly on Mondays, or you can go to Payout Frequency and choose to get paid daily.
Include your tax information to simplify tax season
Go to the Tax Documents page and click on the Tax Settings tab. Once there, you can also view your tax documents at any time.
Manage roles and permissions
Add your staff as users, then assign people to manage certain tasks. This is also where you can identify who can see what, including payment information. You can always reset your password here if needed.
Enable no-contact ordering for dine-in
Let dine-in customers view your menu and make an order directly from their phones. From Settings, click on Get QR Code. Then print your QR code and place it around your store, such as on tables or near the entrance.
4 tips for creating a menu that drives sales
In your Manager portal, click on Menu on the left side. From there, you can either create a new menu or edit an existing one.
Make your dishes easy to customize.
Write thorough descriptions.
Add a clear photo for every item.
Organize your menu by cuisine, diet, or dish type.
Menus that allow for customization get over 20% more orders.*
Keep learning
For a more in-depth look at how to create a menu that sells, download our guide.
3 ways to offer your customers more
Become an allergy-friendly restaurant
Let customers add allergy requests by opting in to our Allergy-Friendly Restaurant program. Plus, you�’ll get listed as an allergy-friendly restaurant.
Allow customizations
Log in to your Uber Eats Manager portal and go to Settings, then toggle “Let customers share food allergies?” to On.
Learn more
Have more questions about allergies? Visit our Allergy-Friendly Restaurant program FAQ.
Automatically optimize your menu
After working with thousands of restaurants, we’ve learned a lot about how customers order. Auto-optimization lets us analyze your menu, then make recommendations based on its performance.
Opt in
Log in to your Uber Eats Manager portal, click on Settings, then toggle “Auto-menu optimization” to On.
More photos, more orders
Menus with photos are 3x** more likely to be ordered from. That’s because people order and eat with their eyes first.
Take great photos
If you’re taking your own photos, use these tips and tricks for capturing eye-catching images.
Hire a pro
If you’d rather work with a photographer, you can schedule a menu photo shoot with us. (US Merchants only)
Changes to your menu items and opening hours
Running a limited-time menu? Closing shop for a special occasion? Here's how to keep customers in the loop.
Resources to edit your existing menu
The following videos can help you make changes to your menu on Menu Maker.
How to add or update items
Freshen up your menu by adding new items, categories, descriptions, and photos.
How to reorder categories and items
Choose the order in which categories and menu items display.
How to create modifier groups
Customize your menu options by adding modifier groups.
How to nest modifier groups
Allow customers to select multiple options for menu items by nesting modifier groups.
How to set modifier quantities
Set the maximum number of modifier options a customer can select.
How to set item prices
Update prices for items that can be customized based on size, protein type, or other attributes.
How to set conditional modifier pricing
Set various price points for price-dependent items with modifier group settings.
Resources to edit your hours
Watch the videos below to learn how to change, add, and update your hours on Menu Maker. You can also use the Holiday Hours tool in Uber Eats Manager for closures on specific days.
How to change operating hours
If you have more than one menu, choose which days and times they are available.
How to add or update item-level hours
You can set custom hours for specific items or specials on your menu.
Changes to order and prep times
Learn the options you have to keep up with orders on even the most demanding of days.
Managing orders and your time
Every minute in the kitchen is critical. Use these tools to reduce wait times, give yourself a buffer, or hit pause so orders don’t pile up.
Enable busy mode
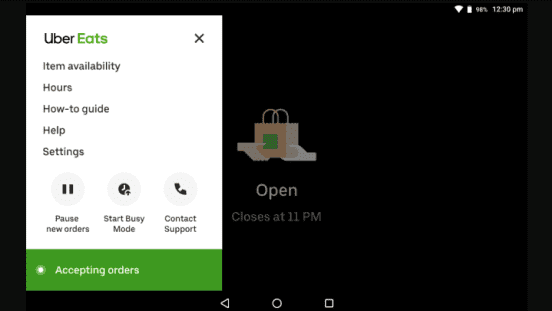
Tap Settings on the homescreen, then Start busy mode. Pick the length of fulfillment time and how long busy mode is needed. To return to normal, tap End busy mode. For more info on managing orders, see our guide.
Give yourself more prep time
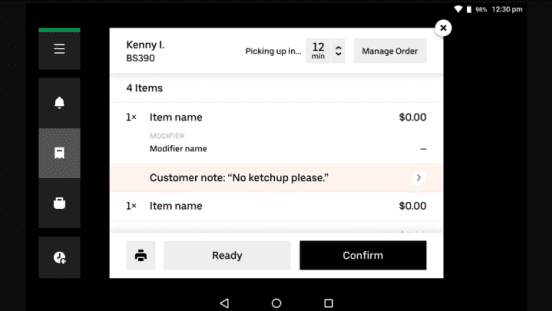
Tap the arrows by the remaining pick up time to delay the order by 5, 10, 20, or even 30 minutes. Order ETAs will update automatically. This feature can only be used only once per order.
Pause or stop new orders
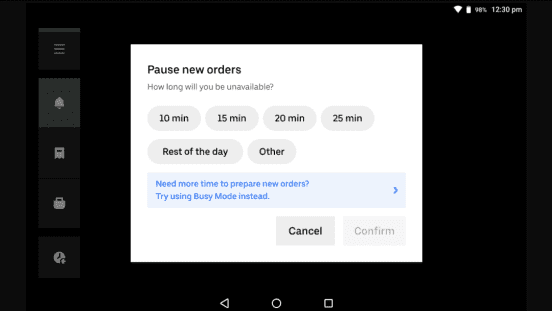
Tap the navigation button and hit Pause new orders. Then Confirm. To receive orders again, go to the Settings tab on the homescreen, then Resume new orders.
Getting Manager for mobile
Manage your storefront and update your menu from anywhere, anytime. When you download the Uber Eats Manager app for iOS or Android, you’ll have access to your Manager portal no matter where you are or what you’re doing.
For more information on getting started, check out our other lessons
Day 1: Exploring the primary tools
Learn about the tools that will help you monitor store performance, orders, deliveries, menus, and more.
Accepting orders
Learn how to manage all of your Uber Eats orders in one place and streamline order handoff.
Managing orders
Learn about the life cycle of each order, how to fulfill orders as they arrive and how to adapt as customers’ needs change.
*Internal Uber Eats data. Results may vary.
**Based on global data for restaurants with fewer than 20 locations, that are non-POS integrated from 2019.
Services
Services
Technology
Manage orders
Simplify operations
Grow your sales
Reach customers
Who we serve
Who we serve
Pricing
Resources
Customer Hub
Learn
Contact us
